

Throughout this blog, I'll be taking you through a general git workflow. I thought of writing up a blog since I seem to forget common commands pretty often and this would then also serve as a reminder for me.
Throughout this blog, we'll work with EddieHubCommunity's hacktoberfest-practice GitHub repository and push our changes there. Sidenote: Eddie is a great promoter of open source and is passionate about introducing people to open source so if you are new to oss, then consider joining his community.
Step 1: Forking the repository
Click on the Fork button on the top right corner to get a local copy of the repository under your github account

This clones the repository under <your-account-name>/hacktoberfest-practice [Go ahead with "Copy the main branch only" checkbox].
What forking does is create a copy of the repository for you to experiment with. Changes that you make to the copied repository won't affect the main repository. In the past, I've made the mistake of thinking that I made changes to the main repository when I actually made changes to the copy.
Step 2: Cloning the copied repository
You've copied the repo. Much success. Now, you need to add your changes but how do you do that locally(locally meaning on your local system)? For that you need to clone the repository onto your local system and then work on it. Cloning essentially downloads the repository folder under the directory where you run the clone command(i.e. your working directory).
[You'll need to have the git cli set up on your local system for this]
You'll be running git clone <url> for cloning the repo and the url supplied is the url needed to locate your copied repository.
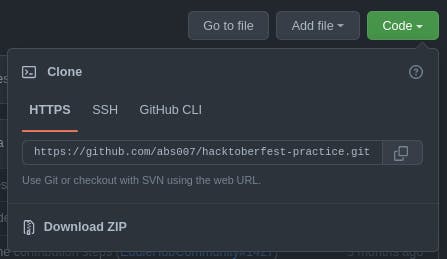
You can also get the url from the code button.
Follow these commands:
git clone https://github.com/<your-user-name>/hacktoberfest-practice.git

cd <working_dir>/hacktoberfest-practice

# Adding the upstream link
git remote add upstream https://github.com/EddieHubCommunity/hacktoberfest-practice.git

# Check your links
git remote -v
On seeing the output you might be confused between upstream and origin. upstream points to the link where the main repository is located and origin points to your copied repository's link
Also, fetch is the link needed for fetching changes and push is the link needed for pushing your changes. You can also change the links stored under fetch and push so that you won't be able to work with either (helps in security purposes).
Step 3: Creating your branch
The next step is to get your local master/main branch up to date(It might be called main or master depending on the repository you're working with). All branches except the main/master can be considered as offshoots of the main branch which people work on individually and then push their branch's changes to the main branch.
Before creating our branch, we'll be rebasing our local main branch to reflect all the changes made in the upstream repository's main branch. This ensures that we have the latest version of the upstream repository locally for us to work with. Rebasing essentially means changing the base and hence you'll be changing your base/main branch to reflect the upstream's main branch. More info here
git fetch upstream

git checkout main

git rebase upstream/main
Upon successfully rebasing our local main branch, we can go ahead and create our own branch to work on changes.
git checkout -b mychanges

#You can run this command to check your current branch
git branch
Now, you're set to go ahead and make changes to the files that you want to. One should always work with changes on their own branches and then commit those changes to the upstream's main branch.
For this guide, we'll be alphabetically adding our name to the README.md file along with our github profile link. Go ahead and add yours.
Step 4: Committing and pushing your changes
Now that you're all set, you'll need to first commit your changes and then push it. Before committing, you'll want to check the status of your repository. Run
git status
and you'll see something like this :
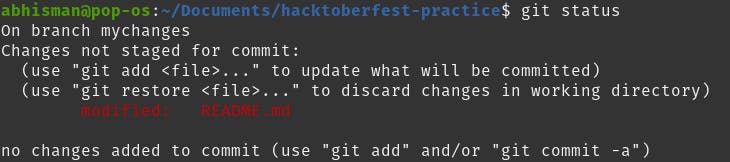
The red text shows that you haven't staged your changes yet. To stage them, run
git add .

# Or
git add README.md
Now upon running git status, you'll be able to see:

This shows that your changes have been staged and now you're all set to commit and push.
Run these commands next:
git commit -m "Added my Name and github id" -s

# Or
git commit -s
The second command opens up a new window where you can type out your commit message. This helps if you need to type your message over multiple lines.
The -s flag makes sure that you leave a sign-off/signature which acts as proof of your work. (You'll need to set up your github user and email-id to have the signature you desire. More info here). You could also not mention the -s flag but it's always good practice to do so.
Push your changes:
git push origin <your-branch>
Step 5: Making the pull request
Once you're all done pushing your changes, you'll need to visit https://github.com/<username>/hacktoberfest-practice and then click on the Compare & Pull Request button.

This'll open up a page which'll show necessary details about the pr that you want to merge. Edit your commit message as per the repository requirements and then click on the Create pull request button to open up your pr

And, that's it. That's how you open up a pr to push your changes and that is all about the general git workflow. Hope you liked the blog :))